
Welcome to Topo Maps+ for the iPhone! Haven’t downloaded the app yet? Click here!
To get started, here is an overview of the buttons displayed on the main screen of the app:
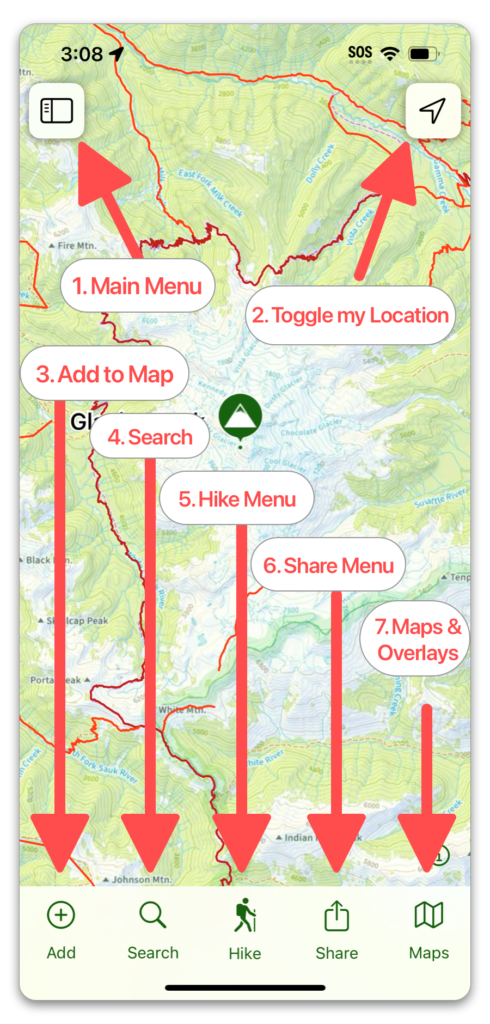
- Main Menu: Tap this button to view your saved Routes, Tracks, Waypoints, Regions, Folders, and any Teams you are a part of. You can also access the Help Center from here and change your settings.
- Toggle Location: Note: In order to show your location, Topo Maps+ needs permission to view your location. There is a prompt when you first try to view your location, or you can go into your iPhone settings (gray gear icon) and scroll down to the Topo Maps+ entry to do this.
- Tap once to center on your location.
- Tap it again to orientate the map based on the compass.
- Tap a 3rd time to hide your location dot.
- Add to Map: Tap this button to add Waypoints, Routes and Regions or Import a map.
- Search: Search for trails, national parks, mountains, or even your own data.
- Hike Menu: Tap this button to access tools for the trail.
- Share, Export & Print: Tap this button to share data or files with others.
- Map Tools and Overlays: Tap this button to view the Preset Map Dashboard and the Advanced Map Dashboard.
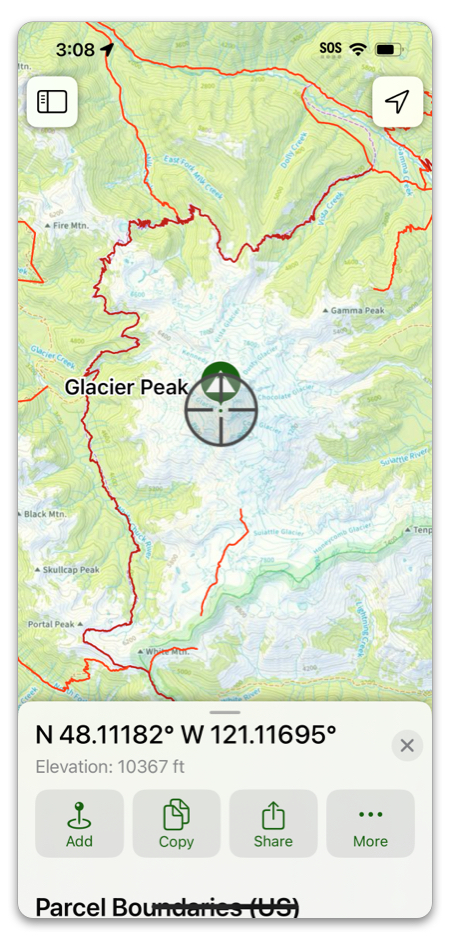
- Long Hold Anywhere: Long pressing anywhere on the map will pull up this menu, where you can add a waypoint, share your location, use the Line of Sight tool, the Guide Me tool, as well as view your coordinates and elevation.
Why the iPhone app?
Though we do support all Apple products, the majority of Topo Maps+ users use an iPhone.
It is the best for using the app while on the trail since it’s usually in your pocket, is handheld, and has GPS even without cell service.
If you like using an iPad or Mac to plan your trip while at home, it’s easy to sync your data between devices! Learn how to here.